Installing Parallels Tools on Bodhi:

If you want to run Bodhi in a VM on your Mac, here’s how you can install Parallels Tools on the Bodhi operating system once the VM has been created.

  • Power on your Bodhi VM and login
  • Select Virtual Machine > Install Parallels Tools from the Parallels menu bar once logged in

Image

  • Double click the Parallels Tools icon once it appears on the desktop

Image

  • Open a terminal window, Click the Desktop, select Applications > System Tools > Terminology

Image

  • Enable the root account on the command line if you haven’t done so already
    • sudo passwd root
  • Enter your password when prompted
  • su to root
    • su root
  • Enter your root password
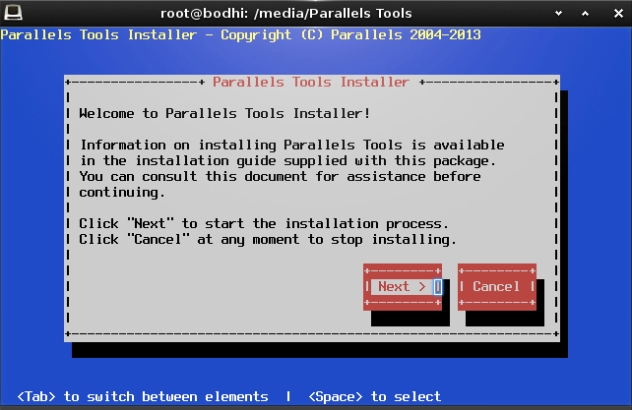
  • cd /media/Parallels\ Tools/
  • ./install

Image

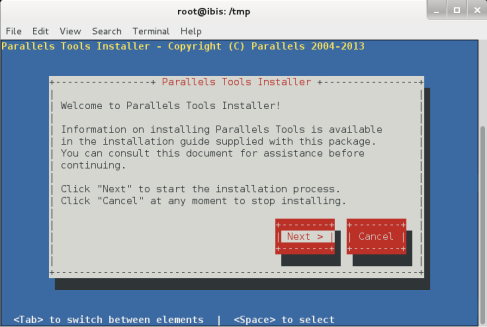
  • Follow the Parallels Tools installation using the on-screen GUI installer

Image

HTH, enjoy using your Bodhi VM with Parallels Tools installed.
Installing Parallels Tools on Kail:

Now that Parallels have updated their Parallels Desktop 8 for Mac (Build 8.0.18483) software to support the Linux 3.7 Kernel here’s how you can install Parallels Tools on the latest Kali operating system.

  • Power on your Kali VM and login as root
  • Select Virtual Machine > Install Parallels Tools from the Parallels menu bar once logged in

Image

  • Open up a Terminal window in Kali and run the following commands
    • cd /media/cdrom0
    • cp -r install installer/ kmods/ tools/ version /tmp
    • cd /tmp
    • ./install

Image

  • Follow the Parallels Tools installation using the on-screen GUI installer

Image

HTH, enjoy using your Kali VM with Parallels Tools installed.

Creating a Synology iSCSI target and connecting it to a VMware ESXi host:

If like me you want to use part of your Synology NAS drive as an ESXi Datastore to locate your virtual machines so that you can move them between ESXi hosts either manually or using vMotion then I’ll show you how below:

1. Creating the iSCSI Target and LUN on your Synology NAS

  • Login to your Synology drive using the web interface and select the Storage Manager option

Image

  • Select the iSCSI Target tab and click Create

Image

  • Give your iSCSI Target a name, leave the IQN as the default and click Next
  • I’m going to assume that you don’t already have an iSCSI LUN created so click Next
  • Leave the default iSCSI LUN (Regular Files) option selected and click Next
  • Give your iSCSI LUN a name and select whether or not you want your LUN to be Thin Provisioned. In brief, if you select YES then your LUN’s capacity will grow to its specified size on demand as you write data to it, if you select NO then it will allocate the total capacity at the time of creating it. Once you’ve decided on your Thin Provisioning option specify the size of your LUN and click Next, review your selections and then click Apply

Image

  • That’s it for the iSCSI Target and LUN creation

2. Adding the iSCSI Target to your VMware ESXi Host

  • Login to your ESXi host using the vSphere client
  • Select the Configuration tab then select the Storage Adapters option from the Hardware section

Image

  • Select Properties… under the Storage Adapters details
  • Select the Dynamic Discovery tab and click Add…
  • Add the IP address of your Synology NAS and click OK

Image

  • Close the Properties window and click Rescan All… under Storage Adapters, click OK when prompted
  • Once complete, select the Storage option from the Hardware section
  • Click Add Storage… click Next and select the Synology LUN we created earlier and click Next

Image

  • Click Next twice and then give your new ESXi Datastore a name
  • Click Next twice then click Finish
  • Your new Datastore will appear in the available Datastores list and it can now be used in the same way as your local storage

Image

HTH, enjoy using your new Synology iSCSI storage with your ESXi hosts.

Installing Kali in Parallels Desktop 7:

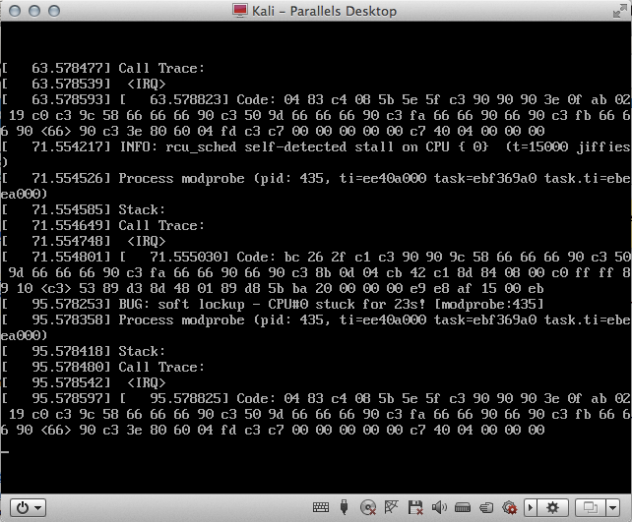
If like me you have tried installing the Kali operating system (http://www.kali.org/) on your Mac using Parallels Desktop 7, then you may have had some issues during the initial boot up after the installation has completed like the “Bug: soft lockup” issue shown below.

Image

The solution to this is to disable the “Show Battery in Linux” setting under the virtual machines configuration settings.

Configure… > Options > Optimization > Setting highlighted red in screenshot below

Image

HTH, enjoy playing with Kali on Parallels!